
This is an exploration on functionality
I’m NOT an engineer, but mechanisms always draw my attention; so during my first year at IDEO I had the privilege to have some time and work on a project of my choice. I wanted to learn about this type of prosthetics while interacting with the very talented people in this office, go deeper into 3D printing, and try to find an improvement to the designs that were available without any electronics. Testing was in my mind but I never got the chance.
Project duration: 4 months / 2016
I want to share my findings in hope someone can push this further.
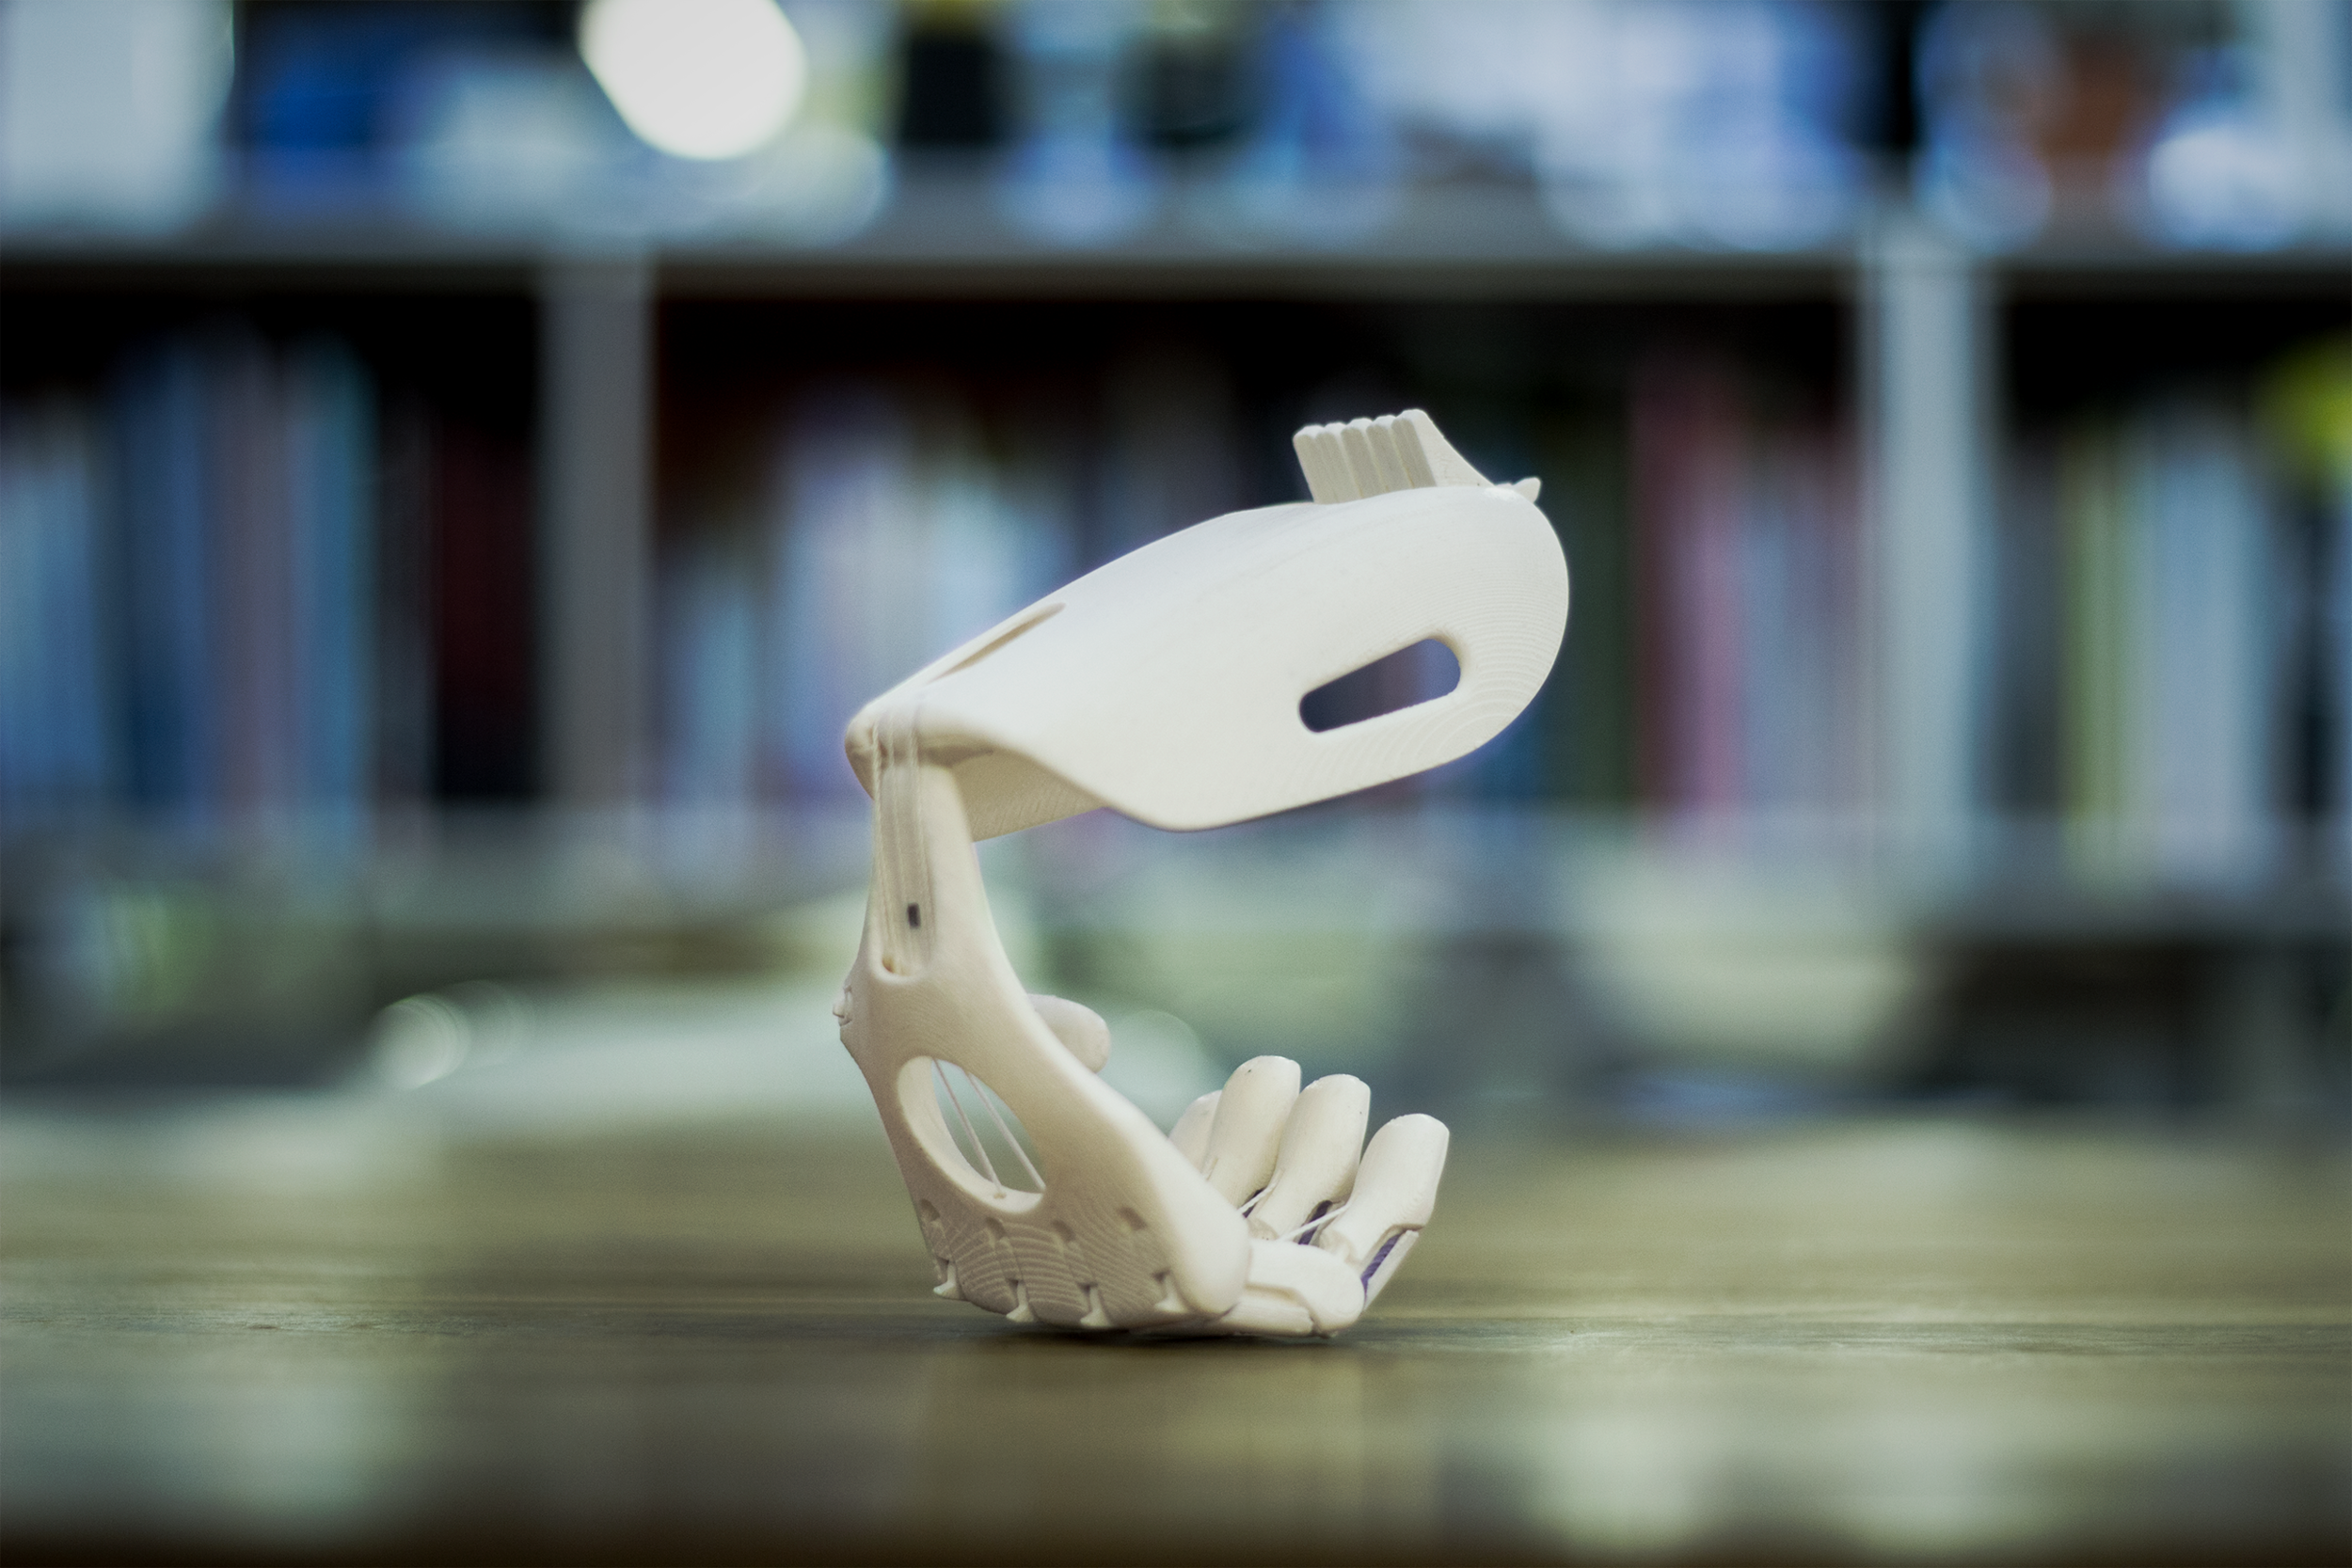
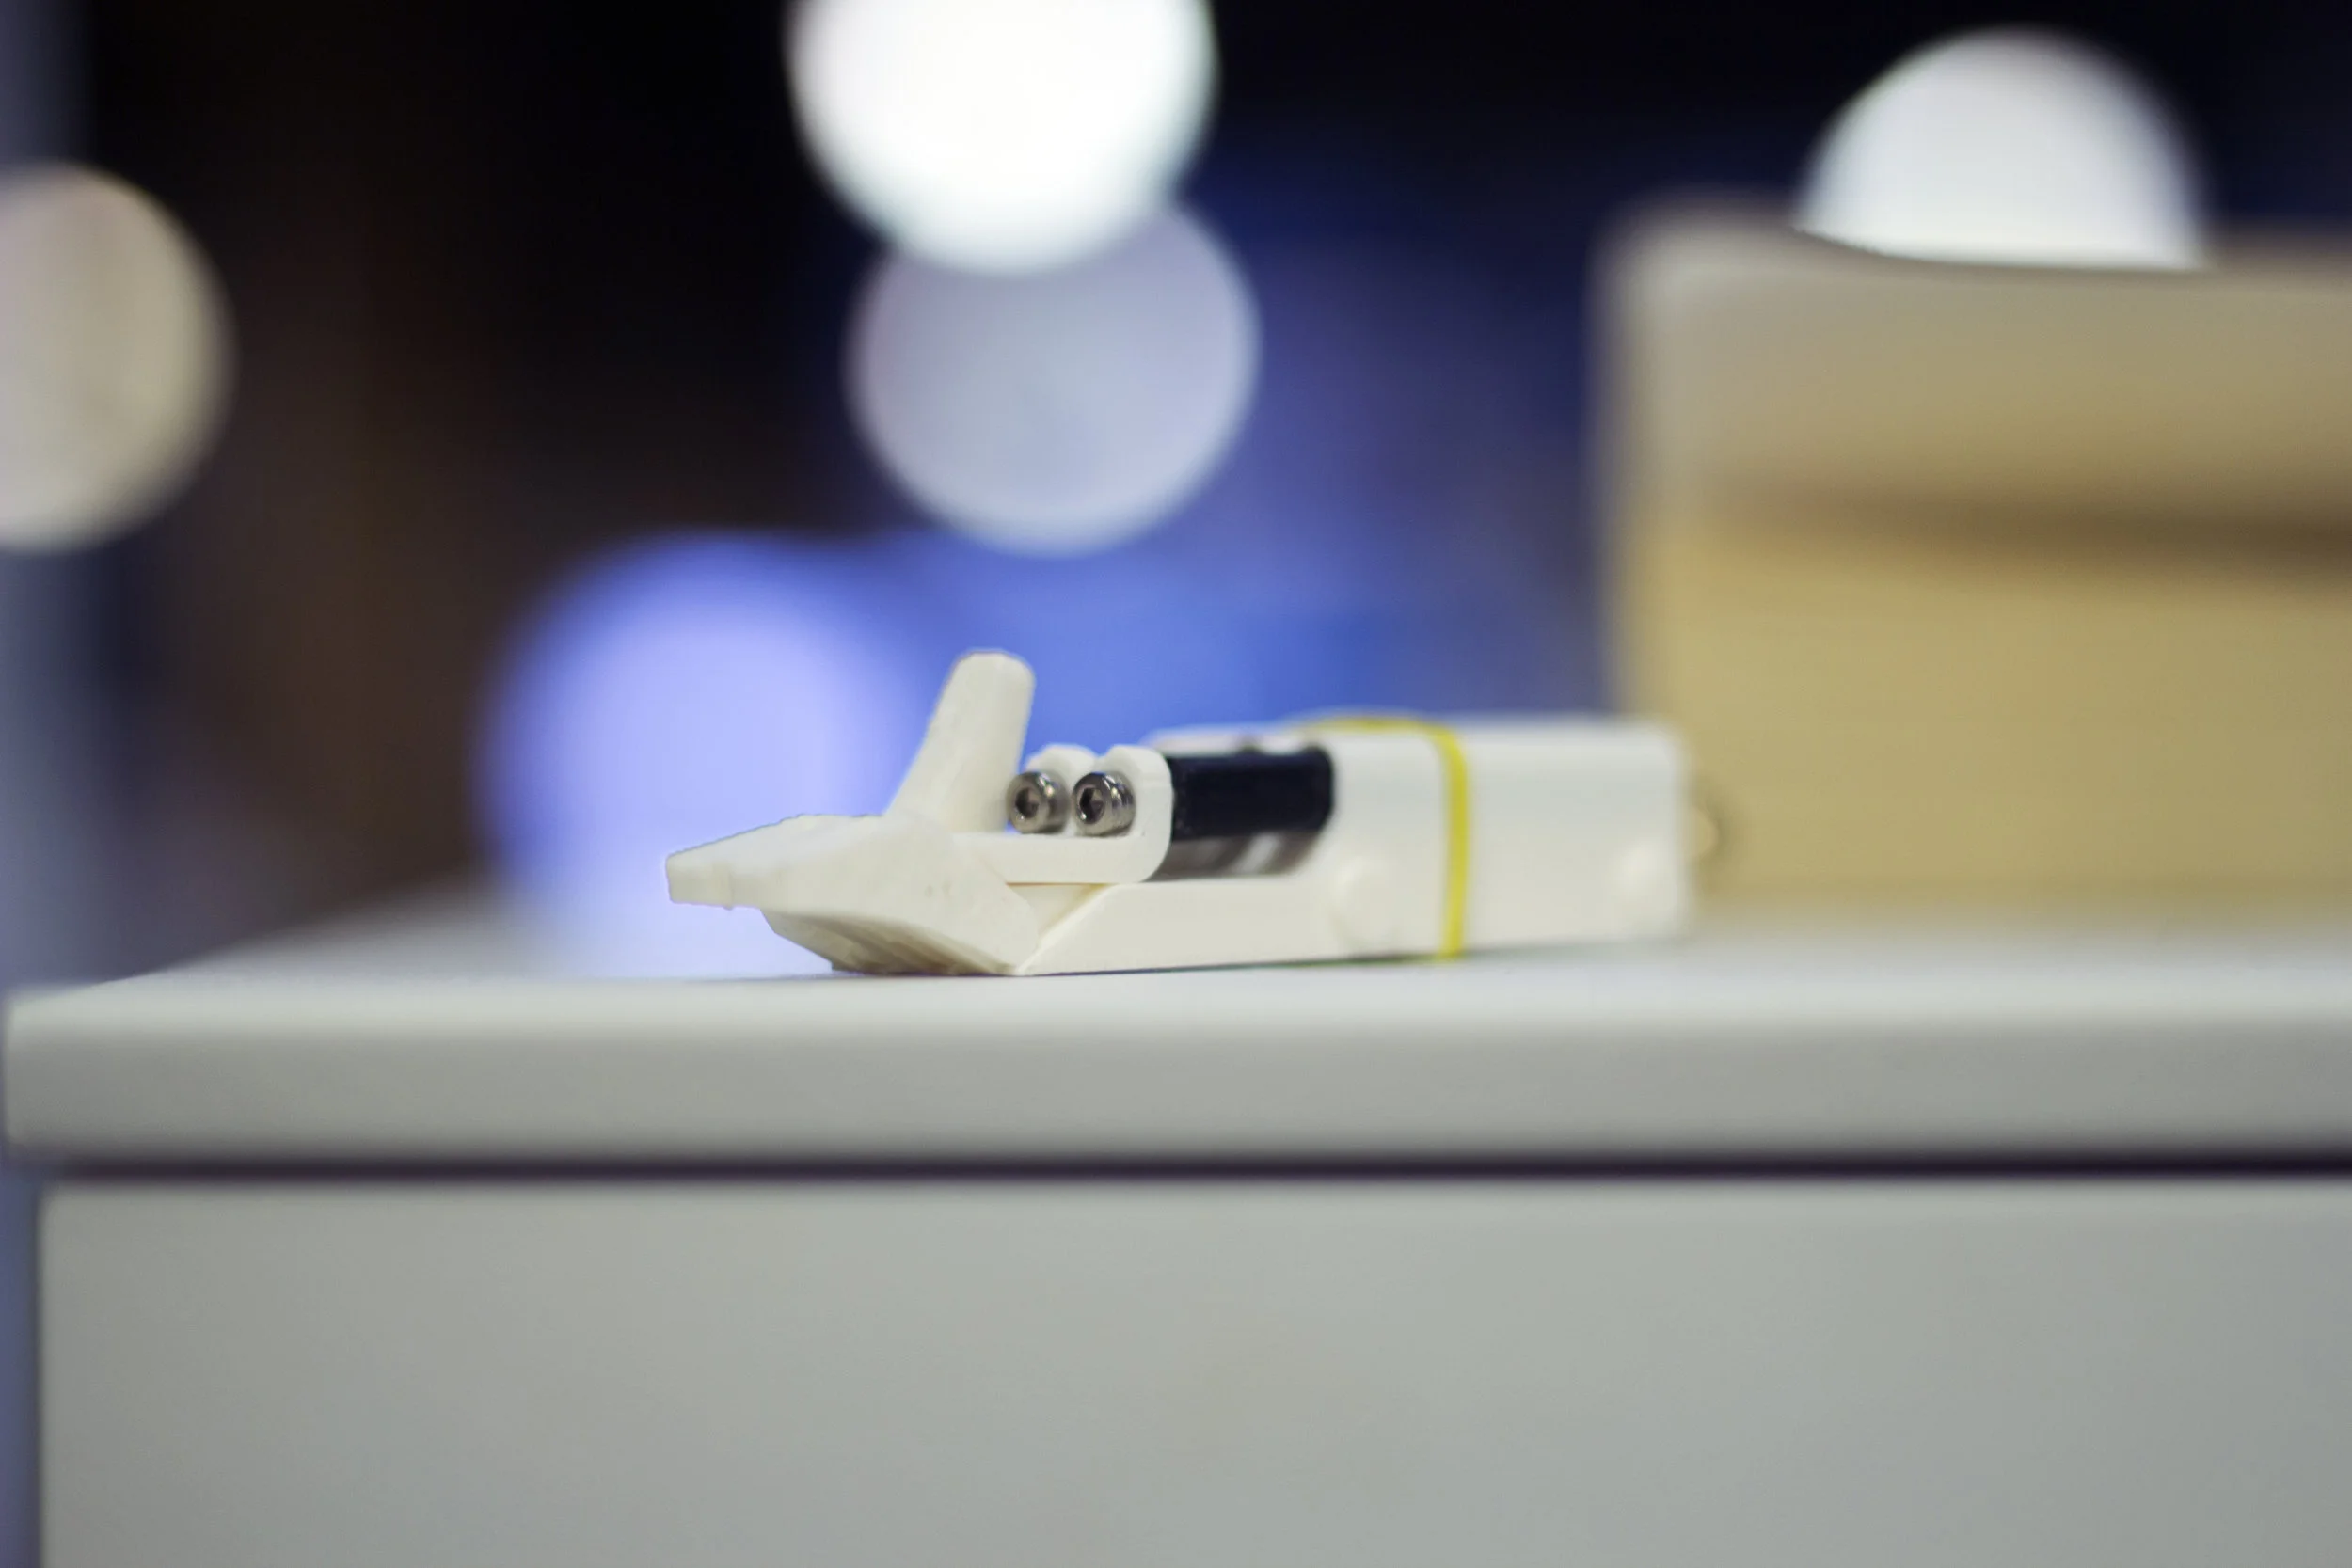
This is a picture of the final design 3D printed and assembled

This is how the current designs for 3D printed prosthetics work
This open source model found on internet is designed for people who was born without fingers but still has a functional wrist. Elastic cords keep the fingers at an open position while the non flexible cord pulls the fingers to a closed position when the wrist is flexed.
I wanted to explore wrist movement and finger gestures
Reproducing the mechanical principle was a good start to explore not just aesthetics, but also to introduce three simple ideas: Maintenance by using common rubber bands to pull the fingers back. Easier assembly by having a one-time-snap for the parts to reduce the overall number of printed parts. Exposure by letting visible the relevant parts for maintenance but also hiding and protecting the sensible parts of the mechanism.

Prototyping one (many) thing (s) at a time
Understanding by making
Prototyping in high-res may be time consuming and it can end in a total failure. On the bright side, you can get much more accurate insights, unexpected discoveries and a great understanding of mechanisms.
I started by designing my interpretation of what a finger would look like and introducing the concepts of Maintenance - Assembly - Exposure
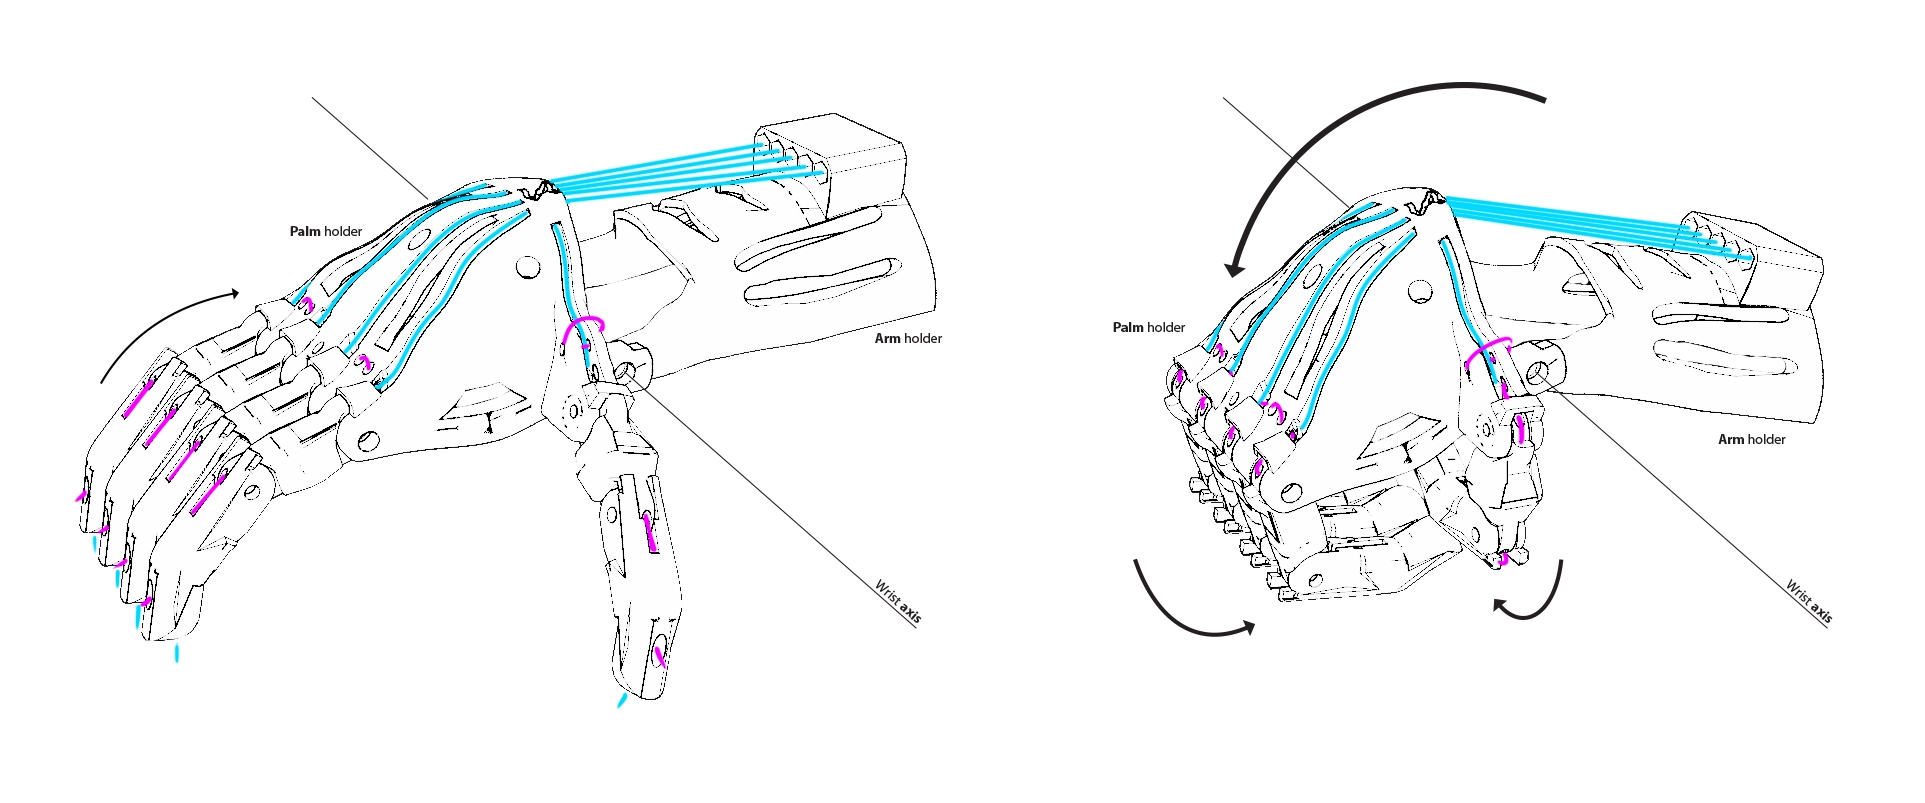
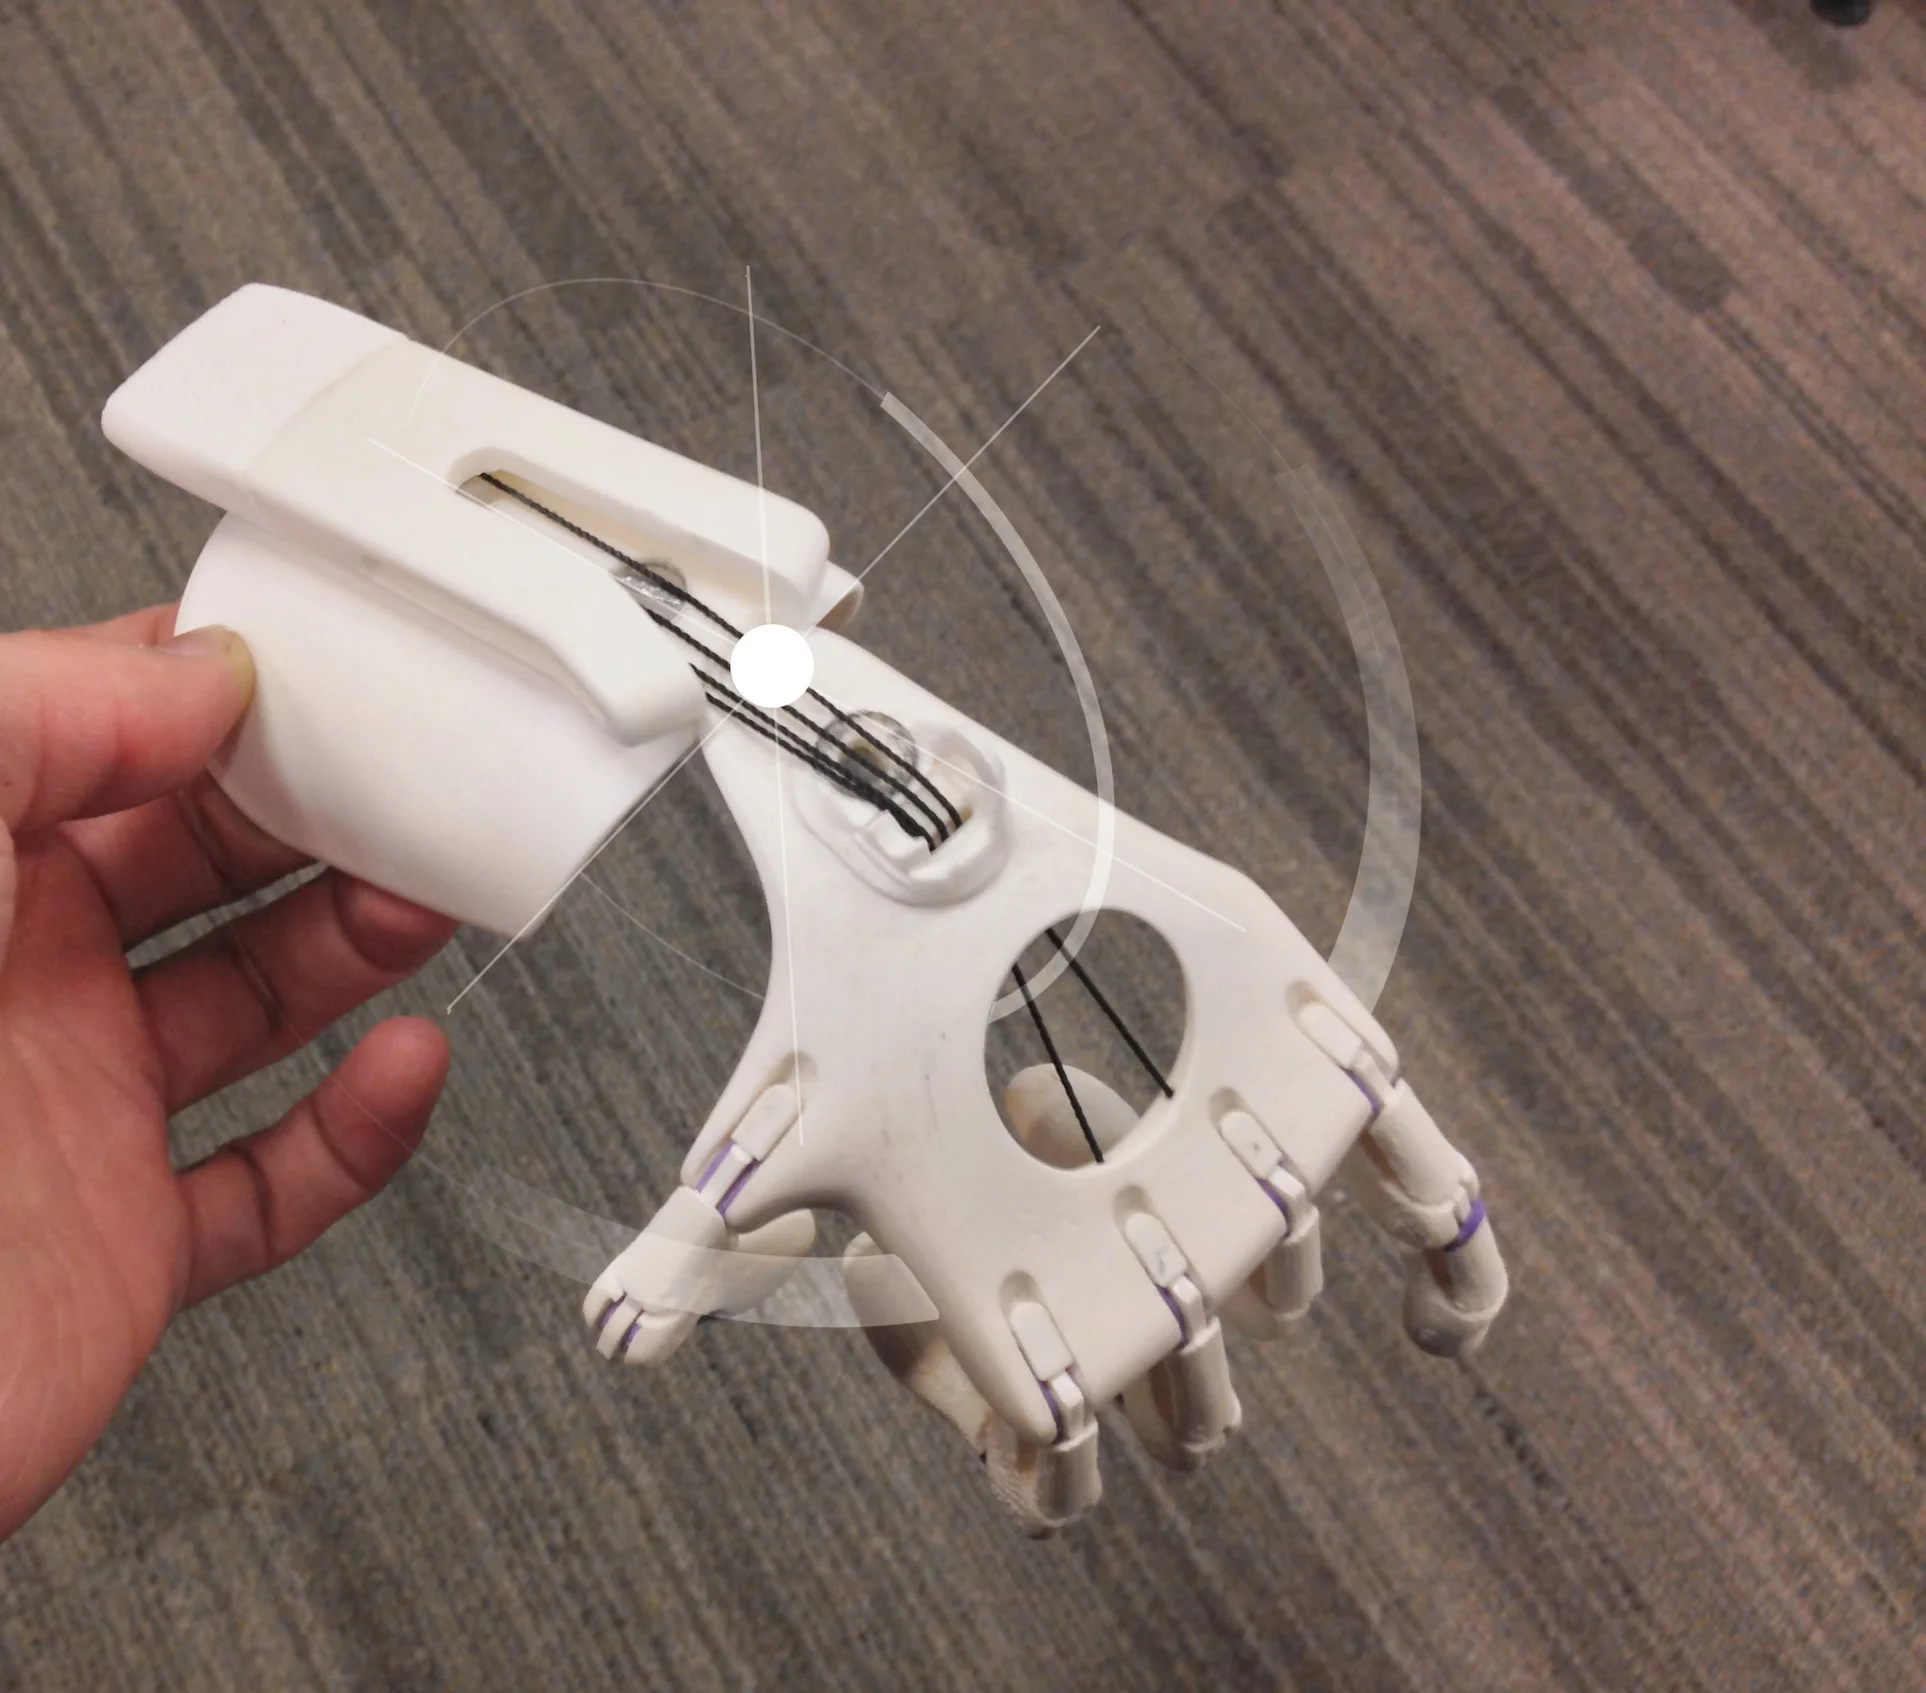
A wrist that can flex in more directions
Once I got to understand the mechanical principle of the fingers, I started building what it could be the full palm. I started by scaling the aesthetics initially explored in order to prototype what it could be a flexible wrist. but before investing heavily on this effort, I made a quick card board mock up (really low-res prototype) to validate the idea first.

An external wrist (bridge) might be able to provide ulnar and radial rotation while being able to flex the wrist and pull the cords to close the fingers.

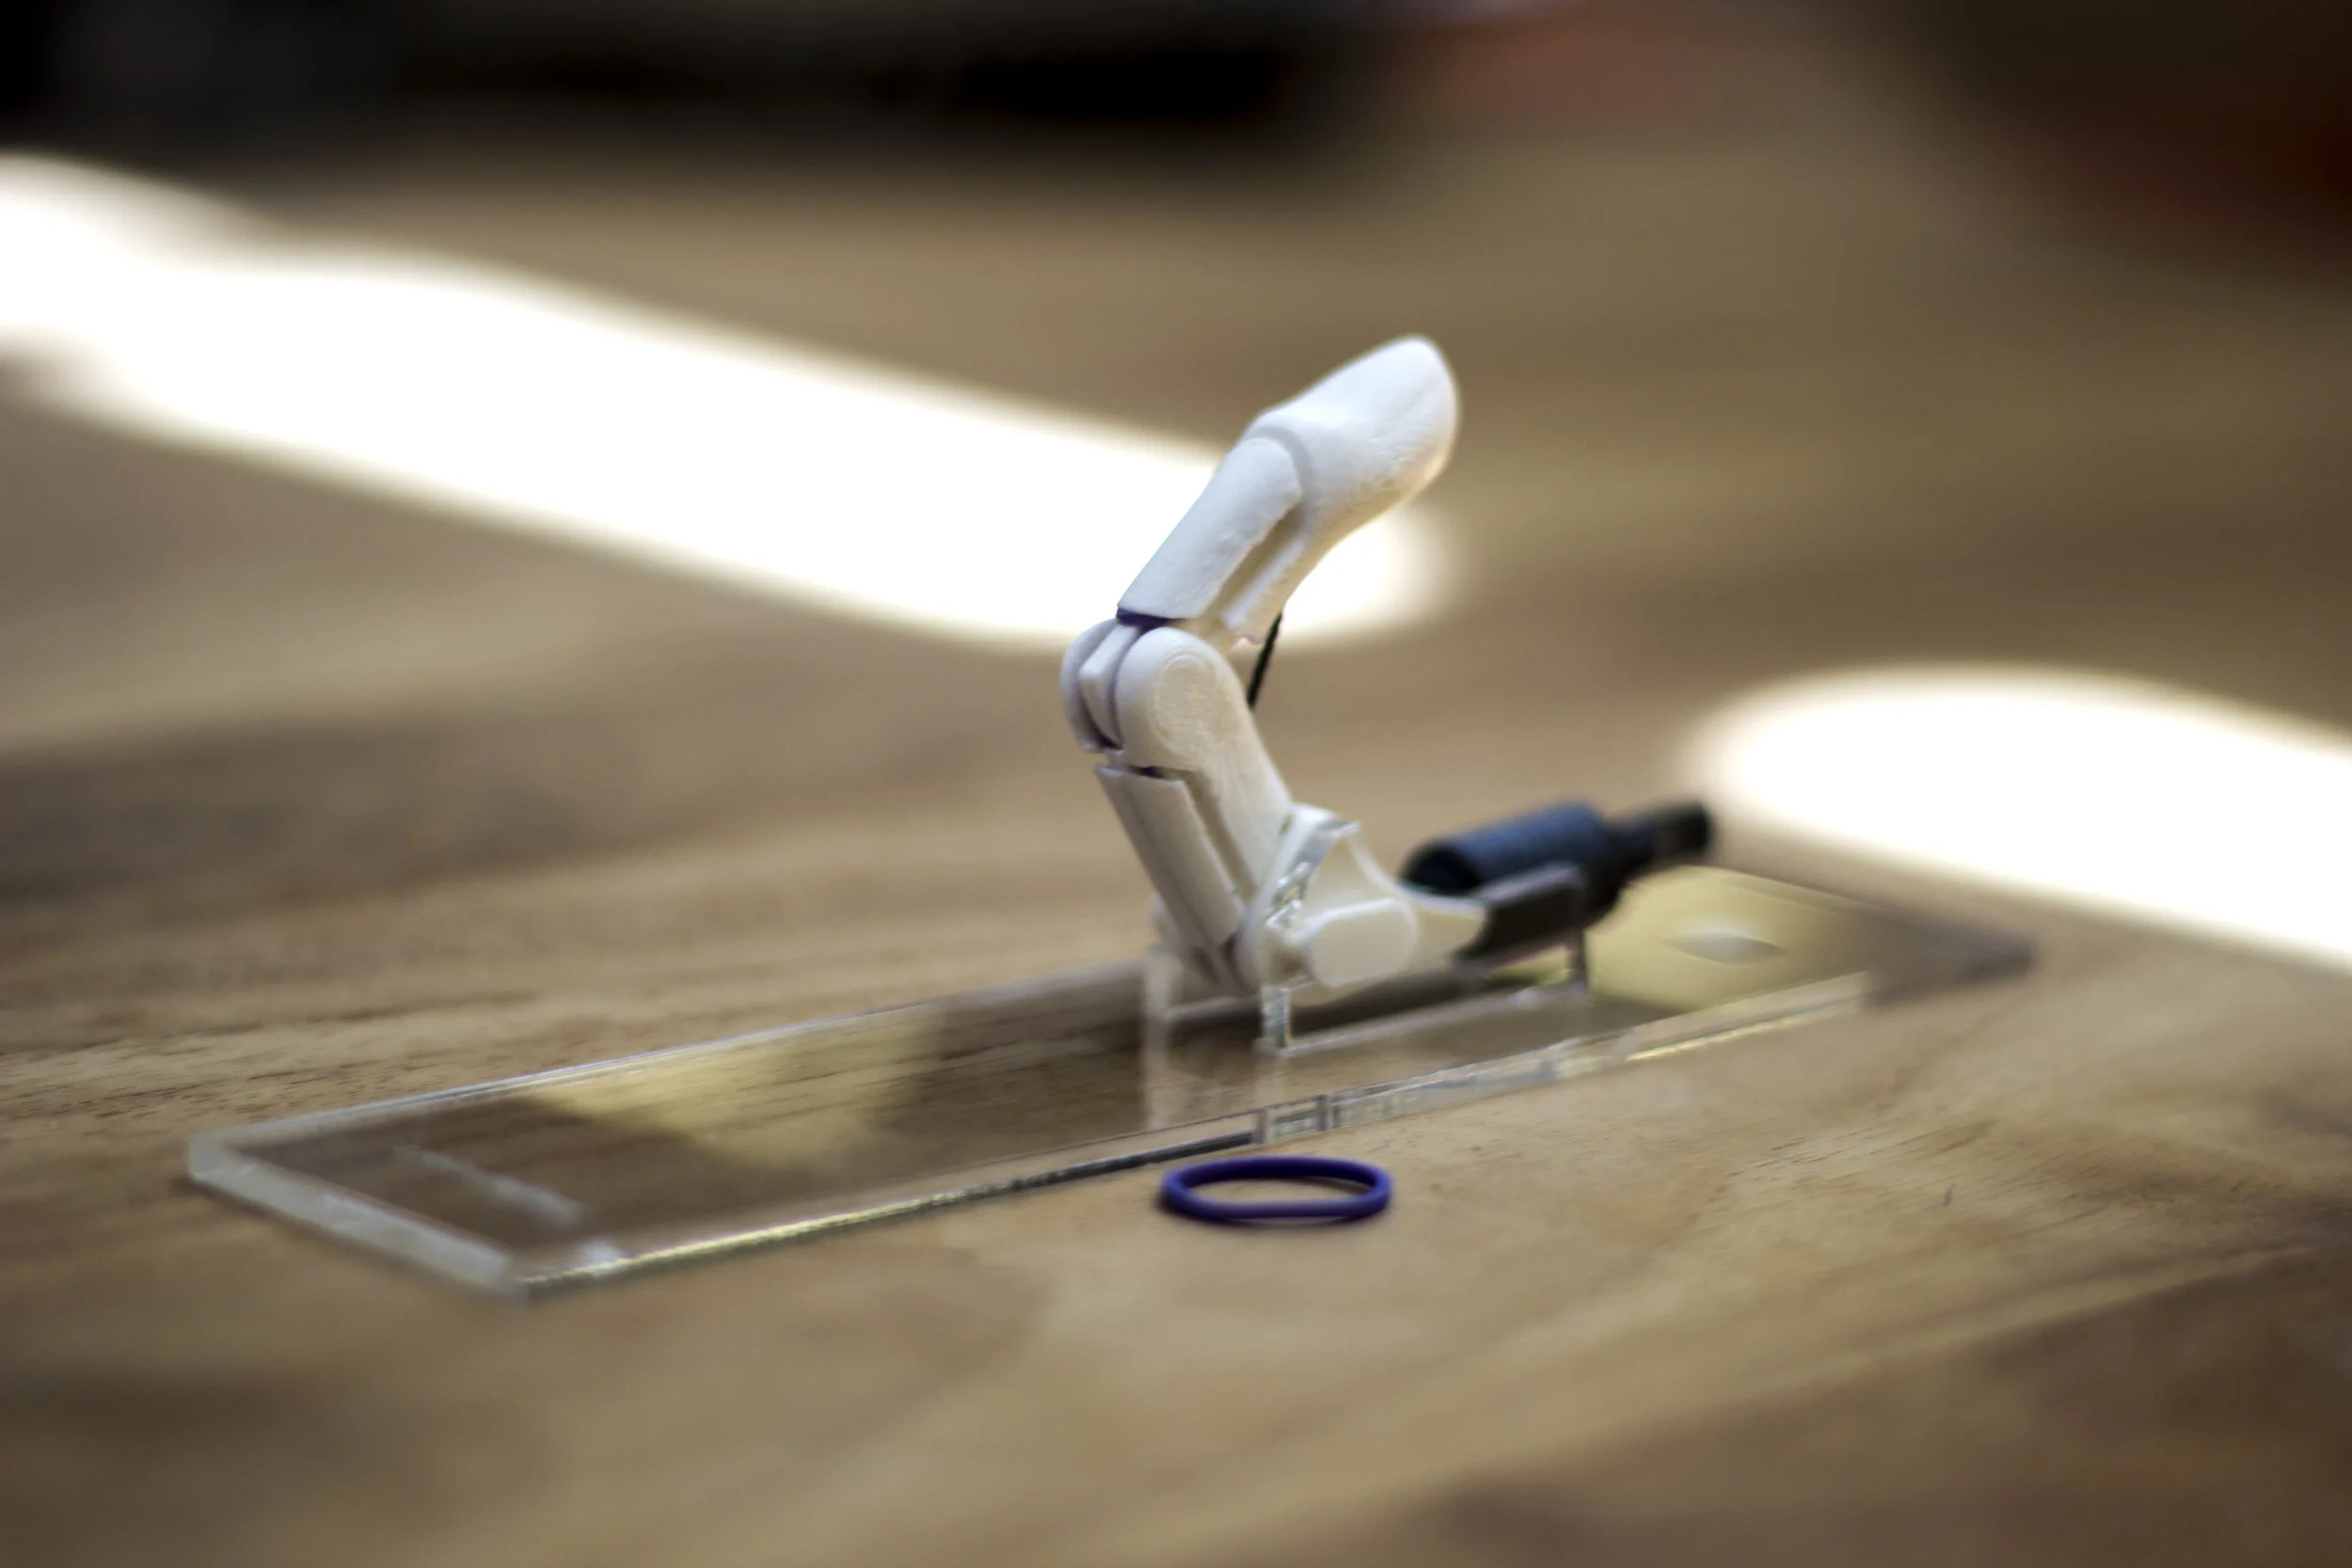
Prototyping this feature in a high fidelity would also give me the opportunity to prototype how the finger's design would fit with everything else , the pal, the arm support and the way the cords would be secured during the assembly.
I tested this prototype with a person who has an approximated wrist size to a kid. This gave me good feedback about this "wrist" idea, and showed me two things...
The tension of the chords make it almost impossible to separate the palm from the arm causing a pain point on the arm, but the assembly, the one time snaps of the parts seemed to have a good behavior and resistance.
1. It needs more work.
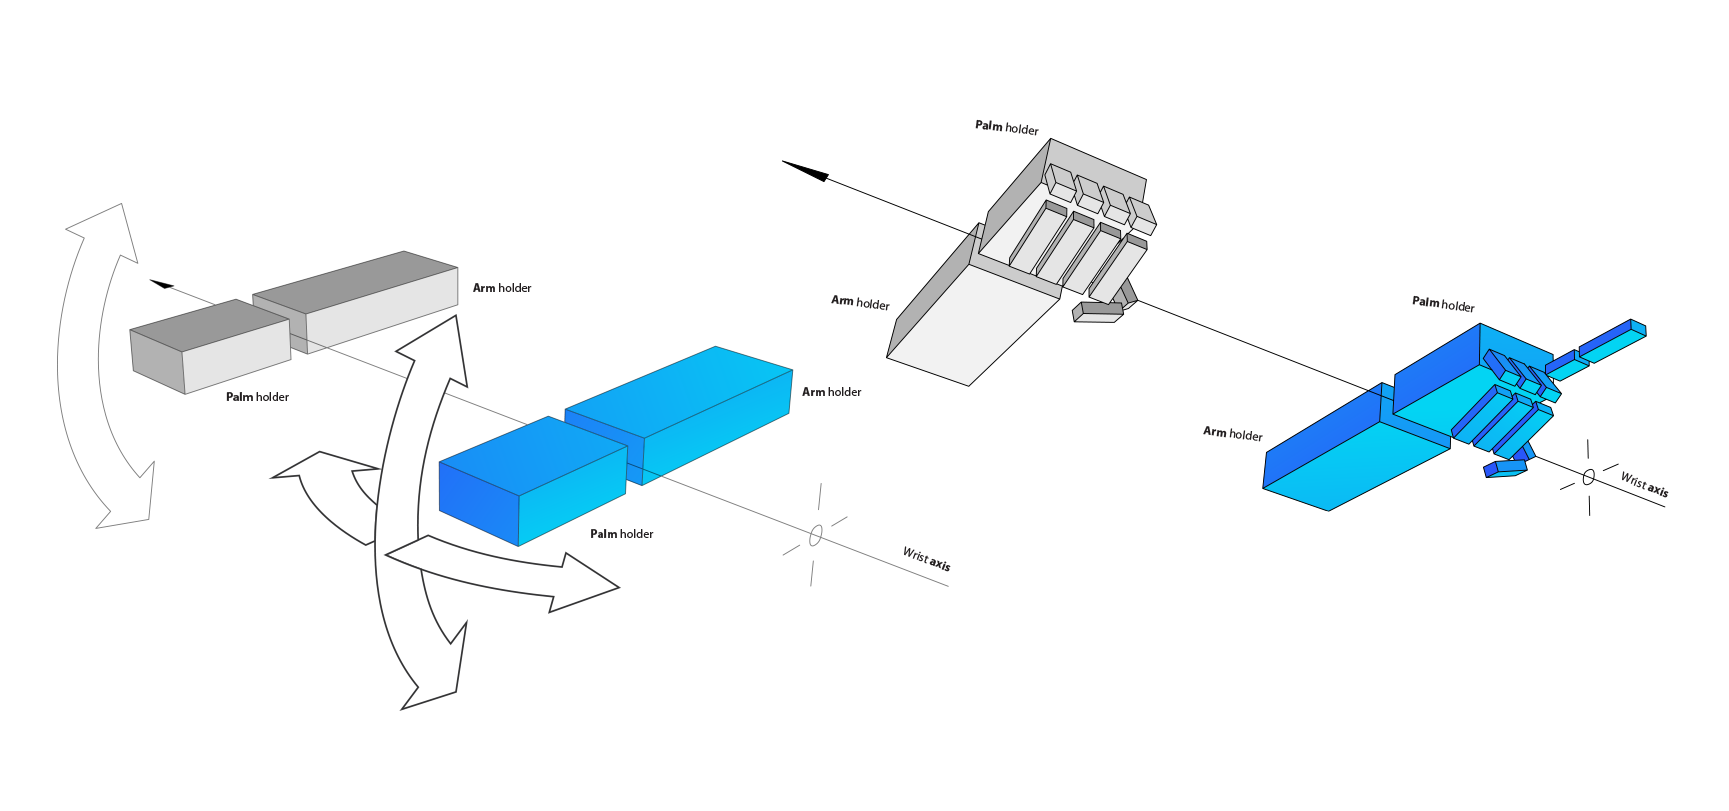
2. A ball joint
Could enable the movement that I was trying to achieve and eliminate the point where the prototype is causing the most friction and eliminate some complicated parts that I had to iterate many times.


"Bean joint wrist"
Although the bio mechanics of the wrist comprehend a relationship of different bones and join hierarchies, this bean shaped joint made it possible to achieve certain degree of movement and it still enabled directionality, whic a perfect sphere wouldn't offer.
Fingers that can move independently
After deciding on a direction for the wrist movement, I noticed I had a big mess when it cam to lock all the chords that were giving the movement to the fingers... but one day at work Hal Monson one of the most senior engineers on the Chicago office shared with the studio his passion about guitars, this gave me an idea.

Having variable limits would allow for variable gestures, what if these gestures were boxes?

It worked ! but it required two hands to change every gesture box, so it's not really practical.
The technical principle of playing with the limits to achieve gestures was working. I felt in love with the idea of having a box for a certain gesture and ended up calling them gesture boxes, I thought it would make it simple for anyone to understand how to interact with the mechanics in a simple way. But the practicality of it was clearly wrong, never the less it was a great starting point to think about individual control over the fingers and embrace the fact that everyone has more than 5 gestures and every culture has such a rich source of communication. After all hands are not only meant to grab things but also to communicate
A lever that could release a finger
I worked on an individual structure that could hold not only the cord of every finger but also being replaceable if it breaks or wears out, I didn't want to use screws for the pivoting points, so the friction and the "clicking point" is done by just using the material.
This is part of the levers system I designed. The module is meant to be printed in a Multi jet fusion Polyamide that can be resistant to friction and wearing, feel free to play with this Rhino ( V5 ) file
Packing everything in one place
After testing the Chord regulators that enable gestures, it was time to test all the elements together ( at least for a print run ) so it was time to sit on the table once again and sketch not just the look and feel but also the interaction of the parts.
I ended up packing everything together in the arm support and playing a lot with tolerances and space to make it something that wouldn't be bulky or aggressive or hard to understand when using. So after re designing the arms support that I initially had, I printed everything and assembled it. the next video shows the Design where I left it.
I didn't have the chance to test this design with a person in disability, and I'm pretty sure there are a lot of things that need work, such as the calculation of the length of the different chords or how useful is the wrist design. I have to remind you that I'm not an engineer, I admire engineers...

This is why I'm putting this out in the world, showing the learnings of my exploration in hope that it can be taken further.
Final Design Video ( 0:14 min )
Send me a message if you are interested on the full CAD of this design, the purpose of the use you would give it, and a little bit about yourself. I'll do my best to reply on time.
Disclaimer: This is a research in progress and this device hasn't had any certification process yet. therefore I'm not responsable in any way of any injuries or damage caused or initiated by this work in progress.